 |
| Hour 1 (plus a little) |
 |
| Hour 2 (plus a little) |
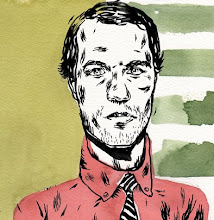
Here a little in-class demonstration I did for my Methods and Media I class at Pratt. Demos can be a little fickle and rushed, but I like how this one came out. I usually do weird colored renditions of celebrities from photos for demos (see the otis below) but this time I thought I'd just paint out a character of my own with more of a realistic feel. I started out with laying the background green, and then layering on the major base colors in the face: the brownish lower portion, the reddish nose and ears and warmer forehead and cheeks. Then I subtracted out some of the lighter portions with a brush and rag, and then just continued building in light and darks. In the second hour I just kept shaping the face, rounding it out and adding detail in the wrinkles as well as finishing out the frilly cravat and jacket. Then I flattened out the background tone to highlight the texture in the face with a couple twinkley stars for giggles. Ba-boom. Wigglebottom.


No comments:
Post a Comment